

Looking for the perfect rice krispie treat recipe that’s easy, fun, and absolutely crowd-pleasing? You’re in the right place. This complete guide walks you through everything you need to know — from the classic three-ingredient version to fruity, peanut buttery, and holiday-themed variations.
Whether you’re whipping up a quick after-school snack, prepping for a bake sale, or just craving a gooey, marshmallow-filled bite, we’ve got you covered. We’ll explore simple ingredients, step-by-step instructions, storage hacks, and even creative serving ideas. Plus, we’ll answer the most common questions people ask — like whether Marshmallow Rice Krispie Treats changed their recipe (spoiler: they kinda did!).
So grab your marshmallows and cereal — it’s time to level up your snack game.
Introduction to Rice Krispie Treats
What Are Rice Krispie Treats?
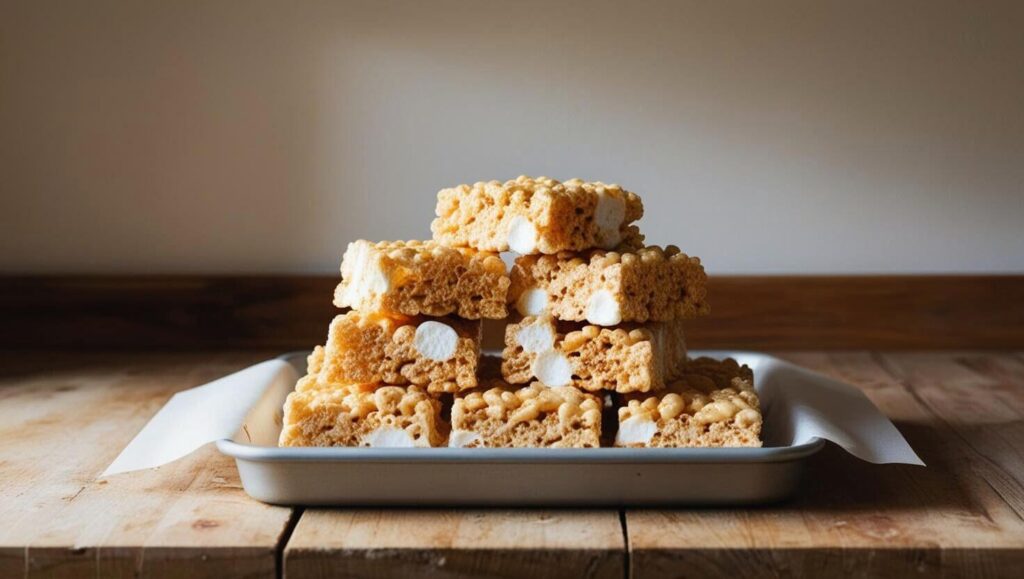
If there’s one dessert that hits all the right notes — easy, fast, fun, and nostalgic — it’s the good ol’ rice krispie treat. These chewy, sticky bars are made by melting butter and marshmallows, then stirring in crisped rice cereal to form soft, golden squares of joy.
But here’s the thing — while they might seem like kid stuff, they’re definitely not just for kids. From holiday dessert tables to wedding dessert bars, they show up everywhere. You can serve them plain or jazz them up with chocolate, sprinkles, or even a layer of peanut butter.
In fact, the real beauty of the rice krispie treat recipe is how easy it is to make your own. No oven, no mixer, no fuss — just a stovetop or microwave, a big pot, and a little creativity.
Why This Classic Dessert Still Shines Today
Let’s face it: some recipes never go out of style. Why? Because they work. The rice krispie treat recipe has been around since the 1930s, and it’s still just as popular as ever.
One big reason is that it’s crazy versatile. Want a gluten-free snack? Done. Need something fun for a birthday party? Toss in some sprinkles. Looking for a budget-friendly dessert that travels well? You got it.
Plus, with the rise of no-bake desserts and simpler cooking, more people are falling in love with these chewy squares all over again. They’re quick, no-frills, and totally delicious. What’s not to love?
Great! I found relevant posts from the BiteRecipe website, including articles like sweet potato casserole recipe and lemon cookies recipe which are complementary to the dessert and family meal theme of the rice krispie treat recipe.
Ingredients for the Perfect Rice Krispie Treat Recipe
Essential Ingredients You’ll Need
Making a Rice Krispie treat recipe starts with just a few simple ingredients. While it’s an easy no-bake dessert, choosing the right components is key to getting that perfect chewy texture and gooey finish.
To begin, here’s what you’ll need:
- Crisped rice cereal – You can go with the classic Rice Krispies brand or a generic version. However, the brand name usually gives better crunch and texture.
- Mini marshmallows – Fresh marshmallows melt more evenly and create a smoother consistency. If you’re using large ones, just chop them up a bit first.
- Unsalted butter – This adds flavor and helps with the melting process. If you like a deeper taste, try browning the butter first.
- Vanilla extract (optional) – Just a splash can enhance the flavor and make your treats stand out.
Even though the ingredients are few, quality matters. Choosing soft, fresh marshmallows and real butter will go a long way toward elevating your rice krispie treat recipe.
Looking for more dessert inspiration? Check out this lemon cookies recipe from BiteRecipe — it’s another sweet and simple favorite.
Choosing the Best Marshmallows and Cereal for Better Results
Not all marshmallows or cereals are equal when it comes to texture and taste. For example, generic marshmallows may not melt as smoothly, leaving behind sticky clumps. That’s why mini marshmallows are the go-to choice — they melt quickly and blend well.
Cereal-wise, fresher is always better. Stale cereal will result in soggy treats that lose their signature crunch. Always check the expiration date, and if possible, give the box a quick shake to ensure the cereal hasn’t gone soft.
If you’re planning to try a twist on the traditional recipe, like using fruity cereals or chocolate crisps, make sure they complement the marshmallow base. Fruity Pebbles, for example, not only add color but a tangy sweetness too.
Step-by-Step Rice Krispie Treat Recipe
Melt, Mix, and Press – The Basic Method
Now that you’ve got your ingredients ready, it’s time to make your rice krispie treat recipe come to life! This classic process takes just 10 minutes, but timing and technique matter.
- Melt the butter in a large pot over medium heat. Stir constantly to avoid burning.
- Add the marshmallows and stir until completely melted. If you’re adding vanilla extract, now’s the time.
- Remove from heat and quickly stir in the rice cereal. Mix thoroughly so every bit gets coated.
- Press into a greased pan using a spatula or wax paper. Lightly press — don’t pack it too tight, or the treats will become hard.
- Let cool for 30 minutes, then slice and serve.
This simple five-step method gives you that perfect balance of gooey and crispy every time. Plus, it’s a great activity to do with kids — no oven required!
Tips for Avoiding Common Mistakes
Even though the process is simple, a few mistakes can affect the final outcome. Here’s how to avoid them:
- Don’t overheat the marshmallows. This makes the mixture too thick and gives you hard treats.
- Mix quickly but gently. If you stir too slow, the cereal clumps. Too rough, and you’ll crush it.
- Use fresh marshmallows. Stale ones won’t melt smoothly, and your treats may be sticky or gritty.
Want to try another no-bake favorite? Browse this easy sweet potato casserole recipe for a warm, family-friendly option.
With just a little attention to detail, your rice krispie treat recipe will turn out just right every single time.
Variations of the Rice Krispie Treat Recipe
Fruity Pebbles Rice Krispie Treats Recipe
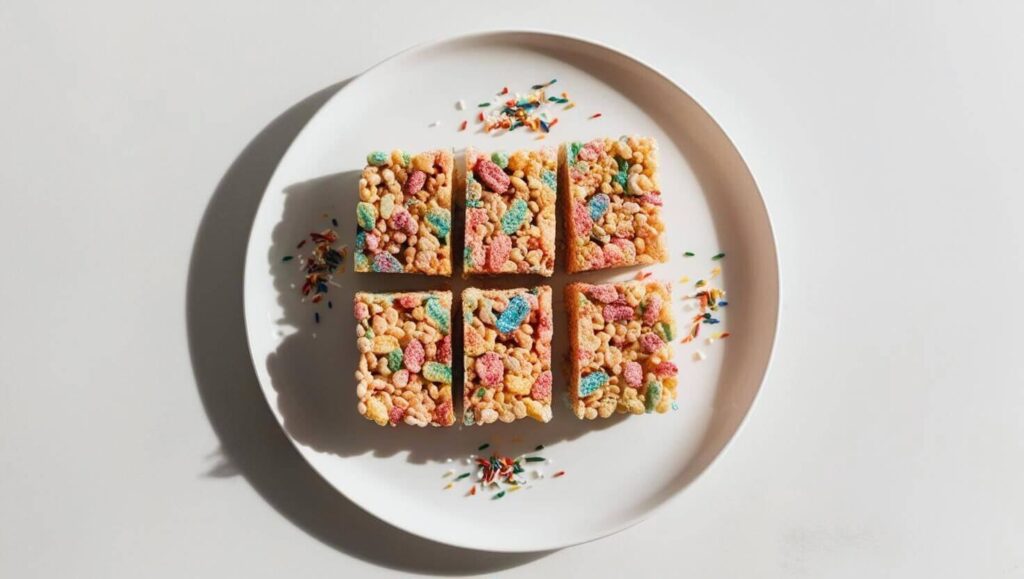
If you’re looking to level up your rice krispie treat recipe, Fruity Pebbles are a colorful and tasty twist! These treats are not only eye-catching, but they also add a bright, fruity flavor that kids and adults both enjoy.
To make this variation:
- Swap your standard rice cereal with Fruity Pebbles in a 1:1 ratio.
- Follow the original steps for melting butter and marshmallows.
- Mix in the Fruity Pebbles quickly, as they tend to soften faster than regular rice cereal.
- Gently press the mixture into a pan and let it cool before slicing.
This version is especially great for birthday parties or festive events, thanks to its bold colors. However, keep in mind that Fruity Pebbles are sweeter than regular cereal, so you might want to slightly reduce the marshmallow quantity if you prefer a balanced taste.
Looking to explore even more playful flavors? Check out our recipe article on lemon cookies for a zesty, tangy dessert option that also stands out at parties.
Peanut Butter, Chocolate, and Other Popular Flavors
Classic doesn’t mean boring. There are many ways to make your rice krispie treat recipe unique with a few flavorful additions:
- Peanut Butter – Stir in 1/2 cup of smooth peanut butter with the melted marshmallows for a nutty, creamy finish. This variation adds richness and a slightly salty kick.
- Chocolate Drizzle or Chunks – Melt chocolate chips and drizzle them over the top or stir them into the cereal for a rich chocolate twist. You can also use cocoa-flavored cereal.
- S’mores-Inspired – Add crushed graham crackers and mini chocolate chips into the mix. Top with extra marshmallows and torch them slightly for an ooey-gooey campfire vibe.
- Holiday Themes – Use red and green sprinkles for Christmas, or candy corn for Halloween to make your treats festive and fun.
These flavor variations make your treats versatile. Whether it’s a potluck, bake sale, or holiday event, they can easily match the mood.
How to Store and Keep Them Fresh
Best Storage Methods for Homemade Rice Krispie Treats
Once you’ve made your batch of delicious bars, you’ll want them to stay fresh and chewy. Luckily, storing your rice krispie treat recipe the right way is super easy.
- Room Temperature: Store them in an airtight container at room temperature for up to three days. This helps maintain their soft texture.
- Layer with Wax Paper: To prevent sticking, place wax paper between layers.
- Don’t Refrigerate: Cold temperatures can make the treats hard and brittle. It’s better to keep them at room temperature unless it’s extremely hot where you live.
If you’re making treats ahead of time, try cutting them just before serving. This helps retain moisture in the center and prevents edges from drying out.
For more delicious recipes, check out our baked beans recipe — another crowd-pleaser that’s perfect for potlucks or gatherings.
Can You Freeze Rice Krispie Treats?
Yes, you can freeze rice krispie treats — but there are a few things to keep in mind. While freezing helps with long-term storage, the texture might change slightly after thawing.
Here’s how to freeze them properly:
- Wrap each square tightly in plastic wrap or wax paper.
- Place them in a freezer-safe bag or airtight container.
- Freeze for up to six weeks.
When you’re ready to enjoy them, just remove the treats from the freezer and let them sit at room temperature for 15–20 minutes. They’ll be just as tasty, especially if you didn’t overcook the marshmallow mixture in the first place.
Still curious about sweet comfort foods? We also recommend reading this sweet potato casserole recipe — another family-friendly, make-ahead favorite.
History and Original Rice Krispie Treat Recipe
The Origin Story: Who Invented Rice Krispie Treats?
Believe it or not, the rice krispie treat recipe wasn’t created in a home kitchen. It actually began as a clever marketing idea. Back in 1939, two Kellogg’s employees, Mildred Day and Malitta Jensen, created the recipe as a fundraiser treat for the Camp Fire Girls organization.
Their goal was simple: to come up with a no-bake snack that used ingredients already found in most kitchens. With just three items — butter, marshmallows, and Rice Krispies — they managed to craft a snack that quickly became a classic.
Over the years, these treats gained popularity due to how quick and kid-friendly they were. Not only were they easy to make, but they also didn’t require baking or fancy tools. This helped cement their place in lunchboxes, bake sales, and holiday dessert tables across America.
The Original Kellogg’s Rice Krispie Treat Recipe
If you’re wondering what the first official rice krispie treat recipe looked like, it’s still surprisingly similar to today’s version. According to Kellogg’s, the original recipe included:
- 3 tablespoons of butter
- 4 cups of mini marshmallows
- 6 cups of Rice Krispies cereal
The method was also straightforward. First, the butter was melted. Then the marshmallows were added and stirred until smooth. Finally, the cereal was gently folded in, and the mixture was pressed into a greased pan.
While there are now dozens of variations, this original formula remains a fan favorite because of its simplicity and nostalgic charm. If you’ve never tried it before, starting with the classic version is a great way to learn the basics.
Creative Serving Ideas for Rice Krispie Treats
Fun Shapes and Themed Treats for Holidays and Events
One of the best things about a rice krispie treat recipe is how flexible it is. Once the mixture cools a bit but hasn’t fully set, you can mold it into different shapes. This makes it perfect for themed parties, holidays, and school events.
Here are a few fun ideas:
- Hearts for Valentine’s Day – Use a cookie cutter to shape your treats and drizzle with red or pink chocolate.
- Pumpkins for Halloween – Add a drop of orange food coloring to the marshmallow mix, and top with green frosting stems.
- Trees or Stars for Christmas – Sprinkle with edible glitter or crushed candy canes for a festive touch.
Not only do shaped treats look great, but they also make snack time more exciting for kids. You can even let them help decorate, turning it into a fun activity.
Rice Krispie Pops, Bars, and Layered Desserts
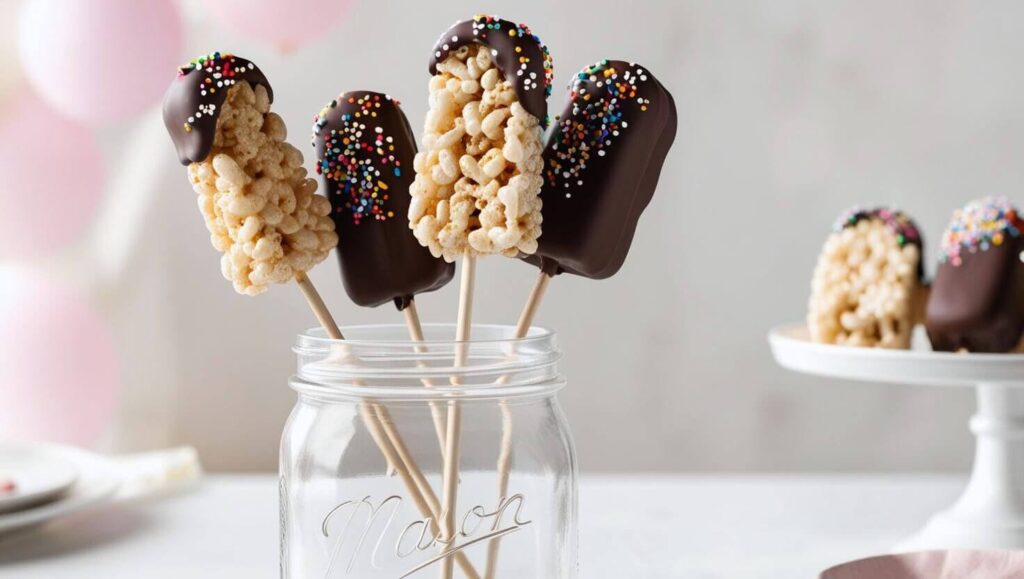
If you’re serving a crowd or just want something new, there are a few creative ways to plate your rice krispie treat recipe:
- Rice Krispie Pops – Insert popsicle sticks into square-cut treats and dip them halfway in chocolate. They’re fun, mess-free, and easy to share.
- Layered Bars – Add a layer of peanut butter or Nutella between two thin layers of Rice Krispies mixture. This gives you a richer, multi-textured treat.
- Mini Sandwiches – Press two small rounds together with frosting or melted chocolate in the center.
These serving ideas are especially helpful when you want to make treats that feel special without adding much extra work. You can prepare them ahead of time and store them just like the regular squares.
If you’re looking for more creative party foods, check out our jello shot recipe guide — perfect for grown-up gatherings with a playful twist.
Frequently Asked Questions (FAQ)
Did Rice Krispies Treats Change Recipe?
Yes, many people have noticed that store-bought Rice Krispies Treats taste a little different than they used to. Over the years, Kellogg’s has made small adjustments to the ingredients in their packaged treats — including changes to the marshmallow content and sweeteners.
However, if you follow a homemade rice krispie treat recipe, you’ll get that original gooey texture and buttery flavor everyone remembers. Making them at home not only lets you control the ingredients but also helps you avoid preservatives or extra sugars often found in pre-packaged versions.
So, while the commercial version may not taste the same, the homemade recipe still delivers the classic flavor we all know and love.
How Do You Make Rice Krispies Treats Recipe from Scratch?
Making a rice krispie treat recipe from scratch is surprisingly simple and doesn’t require any special tools. You’ll just need butter, marshmallows, and rice cereal. First, melt the butter in a pan. Then add in the marshmallows and stir until smooth. Finally, mix in the cereal and press it all into a greased pan.
Let it cool, cut into squares, and you’re done!
Because the recipe is so basic, it’s great for beginners, kids, or anyone short on time. You can also easily double the batch or add your favorite extras like chocolate chips, peanut butter, or sprinkles.
How to Make Rice Krispie Treats with Fruity Pebbles Recipe?
If you’re craving a colorful twist, a Fruity Pebbles rice krispie treat recipe is just what you need. Simply swap the classic Rice Krispies cereal with Fruity Pebbles. Everything else stays the same — butter, marshmallows, and a bit of patience while it cools.
This version adds a sweet and fruity flavor, making it especially fun for birthday parties or festive holidays. Just be sure to stir gently, as Fruity Pebbles can be more delicate than the traditional cereal.
Want more colorful dessert ideas? You might also enjoy our jello shot recipe guide for another playful and party-friendly treat.
What Is the Original Rice Krispie Treat Recipe?
The original rice krispie treat recipe came from Kellogg’s back in the 1930s. It called for three key ingredients: butter, marshmallows, and Rice Krispies cereal. Over time, people began adding their own spins — like vanilla extract, chocolate, or different cereals — but the classic recipe remains popular for a reason.
You simply melt 3 tablespoons of butter, add 4 cups of marshmallows, and stir in 6 cups of cereal. Press it into a pan, let it set, and enjoy!
This original version is still the best place to start if you’re new to making this snack. It’s fast, it’s reliable, and it’s always a hit.
Final Thoughts and Expert Tips
Pro Tips for the Best Texture and Flavor
Even though a rice krispie treat recipe is simple, a few small tips can make a big difference in the final result.
- Use fresh ingredients. Old marshmallows don’t melt well, and stale cereal makes your treats chewy in a bad way.
- Don’t overheat the mixture. High heat makes marshmallows stiff. Always melt them slowly on low or medium heat.
- Lightly press the mix into the pan. If you press too hard, the treats become dense and tough instead of light and chewy.
Also, grease your hands or spatula with butter or non-stick spray before pressing the mix — it makes the job easier and cleaner!
Your Go-To Rice Krispie Treat Recipe for Every Occasion
Whether you’re making snacks for a school event, prepping desserts for a holiday party, or just craving something sweet, a rice krispie treat recipe fits every occasion.
It’s quick, it’s kid-friendly, and it’s endlessly customizable. From the original version to fun holiday-themed shapes, these treats never go out of style. Once you’ve mastered the basics, you’ll find endless ways to personalize them for any season or reason.
For more fun and easy recipe ideas, don’t forget to explore other delicious options on BiteRecipe — there’s always something tasty waiting for you!